【Flutter】テンプレートのプロジェクトを編集 Part2
"ElevatedButton" の追加
_MyHomePageState クラスを編集していく. 各プログラムは以下のように対応している.
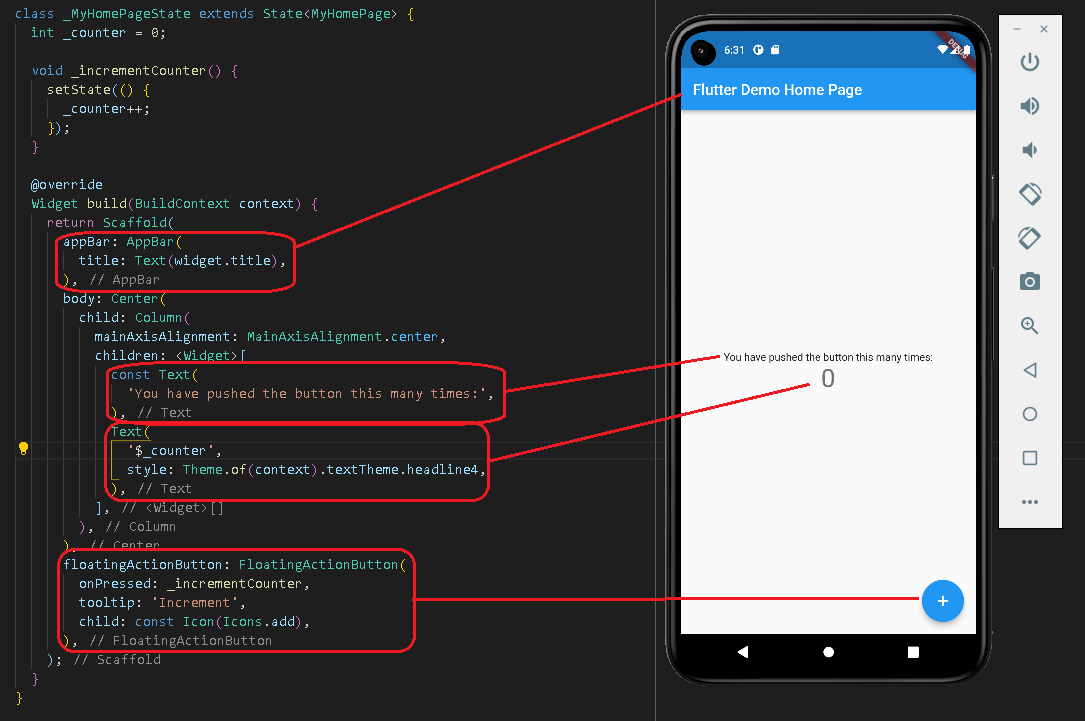
"floatingActionButton" の替わりに "ElevatedButton" を使って画面上にボタンを配置する.
- "floatingActionButton" は削除しておく.
- "ElevatedButton" の "onPressed" は "floatingActionButton" で使用していた
_incrementCounterを使用する.
body: Center(
        child: Column(
          mainAxisAlignment: MainAxisAlignment.center,
          children: <Widget>[
            const Text(
              'You have pushed the button this many times:',
            ),
            Text(
              '$_counter',
              style: Theme.of(context).textTheme.headline4,
            ),
            ElevatedButton(
              onPressed: _incrementCounter,
              child: const Text("+"),
            ),
          ],
        ),
      ),
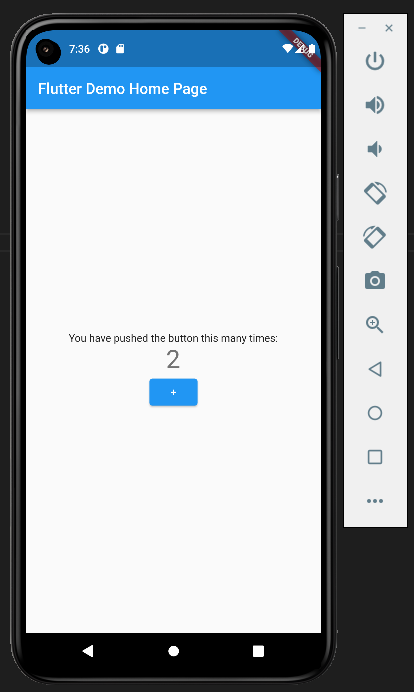
実行結果
上記変更後, デバッグの開始を行うと以下のように画面が更新され, ボタンをタップすると画面上の数字が増えていくのを確認できる.
数字を減らすボタンの追加
今のままでは数字が増えるボタンしかないので, 減らすボタンも追加してみる.
- "_decrementCounter" という関数の追加
- "_incrementCounter"関数を元に, 以下のように "_decrementCounter" を新たに作成する.
  void _decrementCounter() {
    setState(() {
      _counter--;
    });
  }
- 数字を減らすボタンの追加
- "+" ボタンと同じように "-" ボタンを以下のように追加する.
          children: <Widget>[
            const Text(
              'You have pushed the button this many times:',
            ),
            Text(
              '$_counter',
              style: Theme.of(context).textTheme.headline4,
            ),
            ElevatedButton(
              onPressed: _incrementCounter,
              child: const Text("+"),
            ),
+           ElevatedButton(
+             onPressed: _decrementCounter,
+             child: const Text("-"),
+           ),
          ],
実行結果
上記編集後, デバッグを開始すると画像のようになり "-" ボタンを押すと数字が減っていくことを確認できる.
